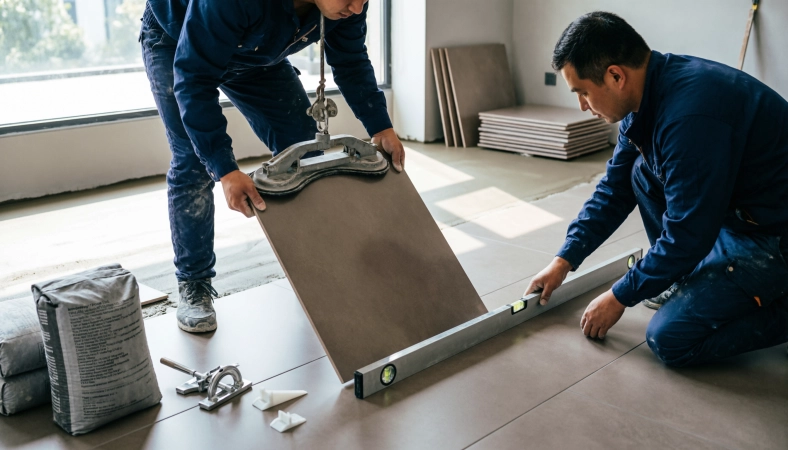
Choosing oversized slab products shifts attention from appearance to assembly. The visual field is calm, yet large format tiles bring handling needs that are less obvious. A flat-looking floor may depend on grinding, lifting aids, and careful joint planning.
Before selecting a shape, review the steps that support a durable finish. Product sheets can describe weight, edge treatment, and recommended setting methods. Those details shape the labor plan, the tool list, and the material order.
A shower wall, kitchen backsplash, and entry floor each impose different demands. Light, moisture, furniture, and foot traffic all affect how the assembly should be built. Thinking in layers helps the final surface remain orderly under daily use. Matching the layer to the room use supports long-term performance.
1. Base Flatness and Support
Long pieces behave like stiff plates over an uneven base. When large format tiles span a dip, the edges can remain proud of the neighboring surface. That raised seam may catch light, disrupt cleaning, and feel noticeable underfoot. The effect is often strongest near doors and walking paths.
A straightedge test can reveal low spots before mortar is mixed. Grinding, patching, or an added underlayment may be needed to create a fair plane. Wood frames may also require closer fastening to limit flex under point loads. Moisture readings may also matter in baths and laundry spaces.
Old carpet padding can compress unevenly and leave a wavy profile. Vinyl adhesive ridges can telegraph upward if they are not scraped away. Documenting corrections gives the next trade a known starting surface.
2. Handling and Setting Pace
Moving a broad unit takes more care than moving a small square. Staff at a ceramic tile shop can note which products need two-person handling or lift aids. The crew must rotate, lower, and align the piece without twisting its body. Gloves and knee pads can reduce slips during repeated adjustments.
Setting time often lengthens because each edge needs frequent checking. A high corner may require lifting the unit and refreshing the bond layer. Dry fitting rows can reveal tight thresholds before adhesive is spread.
Staging boxes near the work area reduces carrying distance across finished rooms. Protecting completed rows with board covers can prevent scuffs from tools and knees. A logical sequence from entry to exit keeps traffic off fresh mortar. Clear hand signals help two workers lower a piece evenly.
3. Bond Layer and Coverage
A rigid tile back needs support across its full surface. Voids beneath the center can create hollow sounds and weak points under traffic. Coverage therefore becomes a primary check during placement. A trowel held at a consistent angle leaves more uniform ridges.
Deeper trowel notches leave taller ridges in the mortar bed. With large format tiles, back-buttering is often used to improve contact at the middle. The skim coat should be continuous, not placed in isolated dabs.
Open time matters because the bed can skin over in warm rooms. Air movement near an open window may shorten the working window. A test square can confirm coverage before the full field begins. Rewetting mortar that has begun to set is not advisable.
4. Cutting Support and Alignment Aids
A long edge can flex if saw support falls short. Adequate table length helps the piece stay steady as the blade passes. Fresh blades and firm guides reduce chips along the glaze or body. Dust control matters near cabinets, painted walls, and new trim.
Suction handles can improve control on smooth, nonporous faces. A ceramic tile shop may stock clips, wedges, and replacement pads for leveling systems. Small spare parts can keep a job from pausing over a broken component. A worn trowel can leave uneven ridges that are hard to correct later.
Wet cutting can splash slurry onto nearby surfaces if barriers are absent. A helper with a mirror can watch tight turns during carrying. Checking tool condition before the first cut saves small but visible errors. Replacement pads should be stored in a dry bin near the work zone.
5. Layout Losses and Spare Units
Every tile project needs extra material for cuts and unforeseen damage. For large format tiles, a mistaken trim can discard a broad section rather than a corner. Transport cracks and dropped edges can also remove usable pieces from the order. Batch variation can make an exact replacement less simple later.
Room proportions influence how many end cuts appear at doors and walls. A dry layout can show narrow slivers before the first permanent set. Centering the field may avoid tiny fragments at prominent entries. Offset patterns can increase trimming along perimeter runs.
Saved spares should be stored flat, dry, and labeled by room. A note with the batch date can help match future repairs. Protective paper between faces can reduce scratches during storage. Keeping one box sealed may preserve a closer tone match.
6. Delivery Route and Indoor Access
Bulky boxes raise access questions before the first piece is carried inside. The counter at a ceramic tile shop can explain freight terms, liftgate limits, and carry-in boundaries. Stairwells, hall corners, and low doorways may block a direct path. Pallet jacks and dollies may not suit every threshold or rug.
Measuring the route can prevent a delivery-day obstruction. Elevator dimensions may matter in multifamily buildings with tight turning radii. Boards and corner guards can protect trim during movement. A covered staging area keeps packaging dry during unexpected rain.
Freight scheduling may require advance notice and someone available to receive. Curbside drop-off can leave indoor carrying to the homeowner or crew. Confirming access early reduces last-minute changes to the work sequence. A brief walkthrough with the installer can identify hidden pinch points.
7. Movement Layers and Joint Planning
Buildings shift with temperature, humidity, and ordinary live loads. A floor with large format tiles can transmit motion if relief joints are absent. Small joints may open at perimeters or changes of plane. Sun exposure and seasonal swings can make the effect more visible.
An uncoupling layer may be recommended over flexible wood bases. Silicone at perimeter joints allows controlled movement without rigid grout cracking. Manufacturer instructions should guide where joints continue through the assembly. Radiant floors add another variable because surface temperature can vary.
Heavy furniture can concentrate load in one area of the field. Rugs and pads should allow subtle movement rather than lock edges. A detail drawn before installation can keep transitions consistent. Changes of direction deserve the same joint logic as the perimeter.
8. Grout Width and Product Selection
Narrow joints create a calm field, but they limit grout choices. A ceramic tile shop can match grout type to joint width and tile face. Sanded mixtures may not pack well into slender channels. Tight spacing also demands consistent edge alignment during setting.
Unsanded products are often selected for tight spacing. Epoxy and urethane blends have distinct mixing and cleanup windows. Sealers may be needed depending on the formulation and room exposure. A wet sponge, pad, and clean water should be ready during cleanup.
A small test patch can reveal color, sheen, and residue behavior. Close color matching can soften minor irregularities in the plane. Strong contrast may highlight a high edge or wavy joint. Tooling timing affects density, color uniformity, and surface clean-up.
Final Planning Notes
A successful oversized tile job is built from many small decisions. Base flatness, handling, coverage, cutting, and layout each affect the result. Delivery access, movement relief, and grout selection matter just as much. Each choice affects the next one, so the sequence matters.
Reviewing product data and installer methods helps align expectations before ordering. A ceramic tile shop can describe preparation steps, tool needs, and spare storage. A written scope can identify who provides lifting aids and cleanup materials. Questions asked early can reduce interruptions once the first row is set.
Room function should shape the detail as much as appearance does. Wet areas, entryways, and heated floors each introduce different demands. Matching the assembly to the environment supports a predictable finished plane. Careful preparation lets the design intent remain clear after furniture arrives.
Comments
No comments yet. Be the first to react!